Pages

Monday, December 19, 2011

Toffee Triangle Cookies

Tis the season to bake cookies and boy, do I bake some cookies.  Holiday baking has been an obsessive hobby of mine since I was very, very little.  I take pride in accurately measuring each ingredient and decorating every single cookie to perfection.  Ironically, this only pertains to holiday baking.  Any other time of the year, I have no patience for the precision that is required for the art of baking.  That being said, I try to take advantage of my inclination when it strikes.  Every year around this time, I wrap up my final exams, put on some holiday tunes and turn my kitchen into my own personal rendition of Santa's bake shop.  Every single recipe I make is very special to me; most of them are passed down from my Oma and have become holiday staples in my mother's kitchen, year after year.  This is only my humble interpretation of my mom's cookies, which always seem to turn out better than mine, simply because they are made with so much love. 

What makes this bite better?
Love.  Lots and lots of love.


 Toffee Triangles 
1 cup salted butter (2 sticks)
1 cup packed brown sugar
1 teaspoon vanilla
Approximately 1 cup chopped walnuts
1 egg yolk
2 cups of flour
10-12oz Chocolate (milk, dark or a combo!)
Sea Salt

Mix together butter and brown sugar then add the egg yolk and vanilla.  Add flour.  Grease a large cookie sheet with butter and then press dough evenly into the sheet.  Bake at 350 degrees for 15-20 minutes until the crust is golden.  Remove from the oven and immediately place chocolate pieces onto the cookie.  Spread evenly. Sprinkle walnuts and sea salt to finish. Gently press the walnuts into the chocolate. Let cool completely and store in the refrigerator until needed.  Cut diagonally into triangles.  Store in an air tight container. 


Wednesday, November 30, 2011

Spicy Cauliflower

Thanksgiving this year, as in every year past, was fantastic.  It was filled with family, friends, laughs and of course, too much food.  When the preparation responsibilities were divvied up,  I was assigned the obligatory task of preparing "healthy" sides. I was determined to prepare vegetables that upstaged even those dishes covered in cream sauce and marshmallows.  I wanted to prove a point. Vegetables are just as tasty, exciting and essential to a holiday spread as any other dish.
What makes this bite better?
If you are going to prepare a spicy dish to compliment any meal, it should be Thanksgiving.  A study published in the British Journal of Nutrition showed that adding red pepper to a meal significantly decreased subsequent calorie intake- a real benefit on a day when calorie counts are through the roof!  The researchers also found that chili may stimulate the parasympathetic nervous system which is responsible for our bodies internal processes including digestion. The benefits of chili pepper were further highlighted in an article published in a Harvard Health Letter that showed adding chili to a meal reduces appetite, increases metabolism, speeds up fat oxidation and regulates insulin levels.  On a day like Thanksgiving, when our bodies can absolutely use a little help in digestion, limiting calorie intake and controlling blood sugar, spice it up!  Keep this recipe on hand for the days of heavy eating that lie ahead.

Spicy Cauliflower
1 head of cauliflower
2 red chili peppers 
3-4 large pieces of garlic
1 teaspoon crushed red pepper flakes
Parmigiano reggiano cheese
Lemon
Salt
Pepper

Clean and cut the cauliflower into bit size pieces.  Line a baking sheet with aluminum foil and toss the cauliflower lightly in olive oil.  Spread evenly on the baking sheet, sprinkle with salt and bake at 350 degrees for about 20 minutes. Toss frequently to cook evenly on all sides.  Cut the chili pepper and garlic and place in a bowl. Add the crushed red pepper chili flakes and cover in olive oil.  Once the cauliflower is cooked through and has a nice browning, remove from the oven and heat a sauté pan over medium on the stove. Heat the olive oil mixture and then add the cauliflower.  Add the juice from one half a fresh lemon.  Salt and pepper to taste.  Allow the flavors to blend and adjust spice to preference by adding more chili flakes.  Remove from heat and finish with parmigiano reggiano cheese.  Serve and enjoy!

Sunday, November 20, 2011

Apple Chips


In order get in the spirit of fall, my best friend Kate and I went to a farm in upstate New York to drink apple cider, sample local wine and pick all the apples we could carry.  We lugged home bags upon bags of apples.  While pies and crumbles were on our list of treats to make, we just did not have enough time or enough recipes to make use of all our apples.  Making apple chips was a great way to turn the remainder of fall fresh apples into an easy, healthy snack.  The cinnamon adds a nice spice and they fill the house with an amazing aroma; an ideal treat for the approaching holidays!

What makes this bite better?
Apparently scientitsts have decided the old adage "an apple a day keeps the doctor away" has some validity.  Recent research on apples has given these fruits, traditionally reserved for the teacher's desk, a more prominent place in the diet.  Other fruits and vegetables, such as berries and dark leafy greens, usually get all the credit in disease prevention.  However, a recent study published in Stroke, the journal of the American Heart Association, has shown that a higher intake of white fruits and vegetables, such as apples, was inversely associated with risk of stroke.  Risk was further reduced as intake increased.  Fruits from the other color groups did not show the same association. 
Apple Chips
Apples
Lemon
Sugar (optional)
Cinnamon (optional)

Fill a large bowl with ice water.  Squeeze one half of a fresh lemon into the water.  Clean and slice the apples using a mandolin.  Remove all seeds and immediately place the apple slices in the water bath to prevent browning.  Set the oven to 200 degrees.  Dry the apples slices and place them on parchment paper on a baking sheet.  Mix equal parts cinnamon and sugar and sprinkle over the apples, if desired.  Bake at 200 degrees until the apples are completely dehydrated, approximately 2 hours. Enjoy :)

Monday, October 17, 2011

Grilled Heirloom Tomato Flatbread

They say it takes 7 to 10 exposures of a new food to acquire a taste for it.  There is some validity to the statement based on the fact that I have integrated previously despised foods into my diet through repeated encounters: olives, beets, peppers, spicy foods, cabbage- the list goes on.  Despite that, I have eaten raw tomatoes hundreds of times and I just can't seem to develop a liking for them.  However, when it comes to heirloom tomatoes, my dislike suddenly disappears.  Heirlooms are exceptionally different from processed, mass-marketed, genetically modified, average run of the mill tomatoes.  The amazing colors and flavor not only rationalize my dislike for the inferior tomatoes but become a sensory experience.  I hoard heirlooms into fall until they slowly start to disappear and I have to wait a whole year for their return.

What makes this bite better?
Just as family heirlooms are highly valued, an heirloom tomato is no different.  Known for their inherited unique characteristics, genetic variation and perfect imperfections, heirloom tomatoes are some of the few diverse foods that still exist in a food system that has been genetically drained and homogenized.  In addition to the enjoyment of their complex flavor, eating heirlooms benefits your health and the environment.  Farmers are more inclined to grow heirlooms locally and organically eliminating the risk of pesticide ingestion or consuming foods that have been artificially ripened or transported environmentally threatening distances. Since heirlooms are grown organically and allowed to fully ripen, they have a higher nutrient content.  In general, tomatoes are high in vitamin C, vitamin K, potassium, other antioxidants and lycopene.  Lycopene promotes prostate health and immune system function in addition to preventing chronic disease and certain types of cancer.  Heirlooms come in a array of colors which indicate varied nutrient content.  So grab a few in every color!


Grilled Heirloom Tomato Flatbread
1 pre-made pizza dough
Corn meal (or other coarse flour)
Heirloom tomatoes
Onion
Basil
Olive Oil
Salt
Pepper
Parmigiano Reggiano (optional)

Spread corn meal or flour on a flat surface to prevent dough from sticking and work dough into a flat circle.  Heat a grill to high.  Brush olive oil on one side of the dough and place oiled side down on grill.  Brush olive oil on the remaining side.  Thinly slice one half of an onion and grill the onions until slightly charred.  Slice the heirloom tomatoes and dress with olive oil, salt and pepper.  Once the pizza has developed grill marks, flip to the other side.  Place onion and heirloom tomatoes on the flatbread and close the grill to allow the tomatoes to heat through.  Finish with basil, additional salt and pepper if needed and parmigiano reggiano cheese if desired.  Slice, serve and enjoy.

Tuesday, October 4, 2011

Granola Bars


I am not a morning person.  I snooze my alarm at least 4 times before I get out of bed and that's on a good day.  Needless to say, I don't leave myself a lot of time in the morning to get out the door, let alone to make a healthy breakfast.  However, I have also found that breakfast is the most difficult meal to eat on the run.  Some of the easy choices are just not healthy- bagels with butter, donuts, pastries, processed bacon, egg and cheese on a biscuit? Yuk.  

I love granola bars and often grab them when I am in a hurry.  But the good ones are expensive and the cheap ones are full of high fructose corn syrup and preservatives (check the labels people).  Granola bars have been on my list of recipes for quite some time, so I finally buckled down and made my own.

It took me two tries to get a recipe I was happy with.  The first batch came out like cardboard.  I was trying to find a substitute for butter, which most recipes call for.  For the first batch I tried almond milk which did not work.  For the second batch I used peanut butter.  This helped maintain moisture while adding extra flavor, protein and healthy fat to substitute for the butter.  It was also important to decrease the amount of oats and increase the amount of nuts, seeds and dried fruit. 

Enjoy the granola bars on their own, topped with almond butter or crumbled with yogurt and fruit.  Breakfast for the week? Check. Now I can sleep in...

What makes this bite better?
Since ancient times, honey has been highly-regarded not only for its sweetness but also for its healing properties.  Honey is rich in antioxidants, specifically phenolic compounds.  Recent studies have identified the phenolic compounds found in honey to be beneficial in the prevention of cardiovascular diseases.  These compounds have also been found to reduce cancer cell proliferation and thus may have important implications in cancer prevention and treatment.  In addition, honey is a great source of energy due to its high carbohydrate content.  This makes it ideal for athletes and children.  Ever since I started training for the NYC marathon I have used honey during training rather than sports gels or chews.  The addition of honey to your diet can have valuable antimicrobial, anti-inflammatory and anti-oxidant effects that other sugars and sweeteners do not provide.

Granola Bars
1 1/2 cup oats
2 1/2 cups mixed nuts, seeds, dried fruit*
1/2 cup honey
1/2 cup peanut butter (almond or cashew)
Salt (about 1/2 teaspoon)
1 teaspoon vanilla (optional)
1 teaspoon cinnamon (optional)

In a large bowl, combine dried ingredients (oats, dried fruit, nuts, seeds, salt and cinnamon).  Heat a saucepan over medium heat and mix honey, vanilla and peanut butter, stirring continuously.  Once combined remove from heat and pour over dried mixture.  Make sure not to let the peanut butter over cook.  The mixture should clump easily.  If the mixture is too moist, add additional oats. If it is too dry, add a small amount of water.  Cover a baking dish with parchment paper.  Choose the size of the baking dish based on your desired thickness of the bars.  Pour the mixture onto the paper and press down to mold the mixture to fit the pan, using parchment paper or plastic wrap.  Make sure the thickness is consistent.  Bake at 350 degrees for about 20 minutes or until the edges and top are golden brown.  Remove and allow to cool completely.  This may take a while and if necessary place in the fridge.  Once completely cooled, cut into squares.  Store for breakfast and enjoy :)

* For this recipe I used dried cranberries, dried raisins, almonds, walnuts, peanuts, pumpkin seeds, flax seeds and sunflower seeds- pretty much anything I had lying around.  Other suggestions include dark chocolate chips, shredded coconut and pecans

Friday, July 29, 2011

Fish Tacos with Peach Salsa

I have pretty much spent the summer wandering from place to place.  Luckily for me, my travels have landed me at the beach with my best friend.  Feeling settled for the first time in a while, I was able to visit a local seafood vendor and a farmer's market and finally got back into the kitchen.  In the mood for some fresh summer fare, I made fish tacos with peach salsa for dinner.  The leftovers provided the ingredients for a perfect summer salad the next day after the beach!
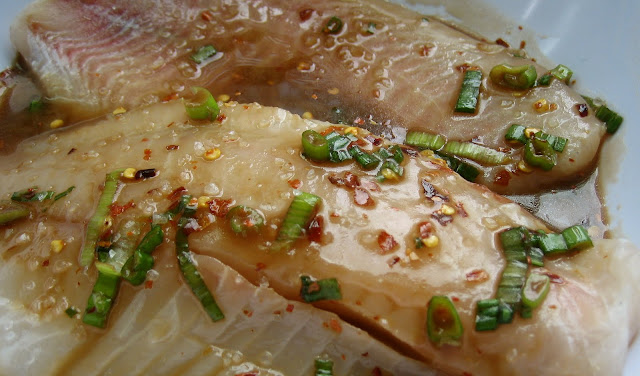
What makes this bite better?
I love tacos.  However, when I eat chicken or beef tacos my instincts (and taste buds) prompt me to reach for cheese and sour cream to accompany them.  Fish tacos not only provide a lean source of protein and healthy omegas but eliminate the desire for fatty toppings.  The perfect accompaniment to fish tacos comes in the form of light, fresh, flavorful salsa. In the summer I can't resist peaches and peppers.  This sweet and spicy salsa not only tickles the tongue but also packs tons of vitamins and minerals into the dish.  In addition, research has shown that capsaicin, found in hot peppers, reduces factors associated with obesity, has strong antioxidant capabilities and may increase metabolism.  Who doesn't like a little extra spice in the summer?!


Fish Tacos
1 pound fresh Grouper (or other white fish)
3-4 fresh summer peaches
1 small green bell pepper
1/4 white onion
2 serrano chile peppers (more or less based on spice preference)
1 T extra virgin olive oil
Juice from 1 fresh lime
1 T minced garlic
Approx. 1 T fresh chopped cilantro
1-2 cups shredded red cabbage
1 avocado sliced
Whole wheat or Chipotle tortillas 
Salt to taste

Peel peaches and cut into chunks.  Clean and dice the green bell pepper, white onion and serrano chiles and add to peaches.  Add 1T olive oil, lime juice, cilantro and salt and toss to combine. Place in the fridge to marinate while you prepare the fish. Salt and pepper the fish on both sides.  Heat pan over medium.  Add approximately 1T minced garlic.  Cook fish until the fish begins to flake then use spatula or a fork to break the filet apart in the pan.  Gently warm the tortillas, thinly slice the red cabbage and cut fresh avocado.  Serve each ingredient in its own bowl to create a build your own taco bar! Enjoy :)


Fish Taco Salad

You can make this salad using leftovers from the fish tacos, or just make it on its own! Cut the tortillas into strips.  Heat oven to 400 degrees and bake until crispy.  In a large bowl combine lettuce and all the ingredients from the fish tacos- fish, peach salsa, avocado, tortilla crisp and red cabbage.  Serve and enjoy :) 

Monday, June 20, 2011

Kale, Basil and Walnut Pesto


I'm not the kind of gal who gives up things I like.  And I love a good burger.  Embarrassingly enough, I actually ate two burgers on Saturday after not having had a burger for months.  After scratching my itch, I think it's safe to say that I have had enough meat to hold me off for a few days.  I will definitely be joining the meatless monday trend this week, and it might even stick for the whole week.

The meatless monday idea is simple-do not eat meat on mondays.  It's sort of like Fridays during Lent, but instead of ordering a pizza out of religious obligation, it is a challenge to incorporate healthy, meat free options into your diet.  I'm not a biggest fan of extreme diets and believe in moderation.  In order for a diet to have an effective impact on your health, it needs to be realistic.  That is why I love the idea of Meatless Mondays.  It's simple approach to making small changes to your diet that can have a large impact on your health.  It's also a great way to incorporate new foods into your diet and experiment with new ingredients and flavors.

What makes this bite better?
I limit the amount of meat in my diet not only for health benefits, but also because of the negative impact meat production has on the environment and because I can't always afford organic, free-range, or local meats. Cutting back on meat reduces dietary intake of saturated fats and reduces risk of related diseases such as heart disease.  Additionally, vegetarian cooking isn't always about avoiding meat as much as it is reaping the benefits of what you replace meat with.  Vegetarian dishes are loaded with vegetables, whole grains, beans, nuts or other healthy components that create balanced, delicious meals. Sometimes, instead of thinking about what you can't eat, it's exciting to think about what you can eat instead.

Kale, Basil and Walnut Pesto
1 bunch of Kale
1 bunch of basil
Garlic
Walnuts
Extra Virgin Olive Oil
Salt to taste

Clean kale and basil and add in equal parts to a food processor.  Add cloves of garlic based on preference.  I added about 3.  Add a handful of walnuts.  Add 2 parts olive oil to 1 part water.  This will create an ideal texture while cutting out some of the fat.  Salt to taste.  Toss with pasta and finish with grated cheese and walnuts. Serve and enjoy :)

Tuesday, June 14, 2011

Arugula with Radish Sprouts and Chive Blossoms


I love going to the Union Square Greenmarket.  It's truly one of my favorite places in the world.  Whether I am searching for new finds, stocking up on basics or just wandering, I always find myself enamored.  The other day, I was just moseying along, excited by all the new signs of summer I noticed popping up, when one stand shook me from my daze.  This one stand always coaxes me into buying something. They are always pushing amazing organic micro-greens, edible flowers and other exotic, seasonal finds that would be impossible to get anywhere else.  They have signs boasting the health benefits of each product and "farmers" that are there to assist you just so happen to be far more attractive than any of the other farmers.  They must be reaping the health benefits of all their goods.  $12.00 for 1/4 pound sounds reasonable.  I'll take it.


I decided to try the chive blossoms and purple radish sprouts.  I thought a little purple would brighten up an otherwise boring arugula salad.  I didn't even know that chives had flower blossoms.  That's another reason why I love the Greenmarket.  I always discover or learn something new every time I go and exploring new foods is certainly one way to make your bite better.

What makes this bite better?
Sprouts are a super food.  Grab whatever kind of sprouts you can find-radish, pea, alfalfa, broccoli, bean- and throw them on anything.  They are a dense source of nutrients, antioxidants and phytochemicals.  A recent study in the Journal of Food Science showed that radish sprouts have a greater concentration of glucosinolates, isothiocyanates, anthocyanins and phenolics than a mature radish taproot.  They produce a much greater antioxidant response, indicating that sprouts may be more beneficial than the mature vegetable.  Sprouts are not only known for the their strong antioxidant capacity but also for their curative effects, especially as it relates to cancer and disease.  Sprouts are currently a focus in nutrition research for their efficacy as chemopreventive agents and anti-tumor agents as well as their impact on osteoporosis progression, menopause and heart disease.

Arugula with Radish Sprouts and Chive Blossoms
Arugula
Chives with blossoms
Purple Radish Sprouts
Olive Oil
Lemon
Salt to taste

Clean flowers, sprouts and arugula.  Chop chive and keep the flower blossoms.  Combine chopped chive with 1 part lemon juice to 2 parts olive oil based on how large your salad is.  Add all ingredients to a large bowl, toss salad with dressing and salt to taste.  Serve and enjoy :) 

Wednesday, June 1, 2011

Portobello Burger


I can not say I am sad to see May go and June arrive.  May was one of the craziest, yet fun filled, months! Celebrating birthdays and weddings made studying for finals quite a challenge, and moving out of my apartment was icing on the cake.  However, Memorial Day came and went, marking the official start of summer.  And the weather has confirmed it-summer is here!  Now it's time to slow things down and enjoy the summer months.  Hopefully they will go by much more slowly than May.

Unlike most Memorial Days past, I did not spend the weekend at the beach or drinking my way from barbeque to barbeque.  Instead, I spent the weekend moving.  Boo hiss.  However, I'm not one to let manual labor and tedious packing prevent me from celebrating the kick off of summer.  Inspired by the thought of the charcoal grills and the first delicious burgers of summer, I whipped up one last meal in my apartment to celebrate as best as I could.   I put my grill pan to use one last time before boxing it away and thought about how great this would have tasted if I made on a real grill...

What makes this bite better?
Now, I'm not saying I don't appreciate a good burger.  I do.  However, I do think there is some room at the summer picnic table for healthier options.  Most people do not buy the highest grade hamburger meat (if they even make their own burgers at all) and the processed buns and cheese could use a quality substitute.  Meatless options are better for your health and better for the earth.  Swapping a hamburger patty for a mushroom burger greatly reduces saturated fat intake and consequently reduces calories.  Using rye bread instead of a high-fructose corn syrup filled bun adds nutrients and cuts back on the sugar and processed carbohydrates.  Using sun-dried tomatoes and basil as a substitute for ketchup not only adds an exciting zing but tons of vitamins and minerals.  The saved calories are better spent on dessert and drinks.  It is a party after all!

Portobello Burgers with Feta, Basil and Sun-dried Tomato Tapenade

Portobello Mushrooms
1 loaf fresh Rye bread
Crumbled Feta
Sun-dried tomatoes
Fresh basil
Garlic
Olive oil
Salt 

Clean the portobello mushrooms, removing the bottoms and then lightly brush with olive oil.  Grill on both sides until tender, about 5 minutes per side.  Cut rye bread about 3/4 inch thick and lightly brush with olive oil and grill on both sides.  In a food processor combine fresh basil, sun-dried tomato, garlic cloves and feta in portions to taste.  Add a small amount of olive oil and salt and blend.  Spread tapenade onto the rye bread and add the portobello mushroom.  Serve and enjoy :)

Thursday, May 5, 2011

Barley with Ramps and Mushrooms


The other day, my sister sent me a text message requesting suggestions for lunch.  Sick of salads and trying to avoid bread, she was at a loss for how she could construct a healthy lunch.  This dish is one of my solutions.  When bored of redundant lunch options, people often forget about healthy grains.  Barley, brown rice, quinoa and the like can all provide the base for interesting, satisfying and balanced lunches.  Healthy meals do not always need to be piled on top of lettuce or squeezed between two pieces of whole wheat bread.  Grains, like the barley in this recipe, are a great medium for a healthy lunch with a twist.  Enjoy this dish during lunch and later in the week as a healthy side at dinner.  If you normally go for chinese at lunch, this should be right up your alley.

This dish is inspired by my current obsession with ramps. Ramps are wild leeks that boast flavors of garlic and onion with a slight sweetness and hint of earthiness. I had no idea what a ramp was until we started serving them at the restaurant where I work (and then noticed them popping up on menus all over the city!) Now, I can't get enough of them.  I order them every time I'm out to eat and I throw them into every dish I can think of.  Along with fiddlehead ferns, stinging nettles and morel mushrooms, ramps must be foraged and are only available during delicate time frames.  Like other components of the food movement, foraging has come to the forefront of trends this spring.  Now, I'm not saying that I'm headed to the hills to find my own food, but I will gladly sweep up whatever I can find at the farmer's market.

What makes this bite better?
Barley is loaded with fiber to keep you fuller longer,  making it an ideal choice for lunch.  Ramps are high in Vitamin A, Vitamin C, selenium and chromium and crimini mushrooms contain selenium as well.  Selenium is a mineral that has high antioxidant properties and has recently been shown to reduce cancer risk, risk of death due to cancer and risk of heart disease. Also, choosing foods such as ramps supports organic local food initiatives and serve a gentle reminder that there are still some foods we can only enjoy at the mercy of Mother Earth.


Barley with Mushrooms and Ramps
2 cups barley
1/2 pound ramps
1 pound crimini mushrooms (or your choice)
Extra virgin olive oil
Salt and pepper to taste

Bring 4 cups of water to a boil and lightly salt.  Add 2 cups of barley and return to a boil. Once at a boil, cover and reduce to a simmer for about 20 minutes or until all the water has been absorbed.  Remove the lid from the barley and turn off the heat.  Allow to rest for 5-10 minutes and then fluff with a fork.  While the barley is cooking, clean the mushrooms and the ramps.  Heat a pan to medium and drizzle olive oil.  Cook the mushrooms and then add the ramps. Ramps will cook down like a spinach.  Salt and pepper to taste.  Add the mushrooms and ramps to the barley and toss well.  Add additional olive oil, salt or pepper if necessary.  Serve and enjoy :)

Thursday, April 28, 2011

Whole Wheat Penne with Tilapia, Arugula and Balsamic


I love sauces, dips, dressings and marinades.  They add the most exciting flavors to food but they can also make or break the nutritional value of a dish.  The dressing in this dish is one of my favorites not only because it's healthy and flavorful but because of its versatility.  I use it as a salad dressing to snazz up spinach or as a marinade on chicken, fish or shrimp.  I also love to use it as a sauce in a stir fry or in this case, a pasta.  It is sweet yet tangy and you can control the spice.  

I rarely measure anything when I cook (flaw) but below are my rough estimates.  You can modify based on your preferences and the size of the dish you are making.  The amounts given are appropriate to make this pasta dish.  I used an awesome aged balsamic vinegar that I have and it is sweeter and has a thicker texture.  You can use a regular balsamic but you might want to add additional honey.  Taste as you go.  This dish can be enjoyed hot or cold. Be sure to make a bit extra to drizzle on top of the pasta as you serve it!
Balsamic Dressing with Crushed Red Pepper and Scallion

3-4 tablespoons olive oil 
1 tablespoon Balsamic Vinegar
Juice from 1/2 lemon
1 tablespoon honey
1 teaspoon crushed red pepper
1 stalk scallion, chopped
What makes this bite better?
I am a huge fan of one dish wonders.  Whenever a dish has lean protein, fiber and veggies it's a hit in my book. In addition to the health benefits of fish and olive oil, arugula is a star in this dish.  Arugula is an amazing green because it's easy to add to hot and cold dishes.  It is actually in the brassica family making it a relative of kale, broccoli, brussels sprouts and cabbage.  It is loaded with Vitamins A, C and K as well as calcium and other minerals. Eat it as often as you can, cooked or raw. 


 Whole Wheat Penne with Tilapia and Arugula
1 box whole wheat penne
1 pound tilapia filets
2 cups arugula
Dressing (above), divided
Scallion (optional)
Crushed red pepper (optional)
Salt to taste

Marinate the tilapia filets in the dressing, using about half the quantity of dressing.  In a large pot, bring water, olive oil and salt to a roaring boil and cook the pasta.  Heat a separate pan over medium.  Cook the tilapia filets until they are cooked through.  Gently break apart the filets into bite size pieces.  Add the additional sauce and allow to simmer for about 5 minutes.  Add a ladle full of water from the pasta to the pan to create more sauce.  Drain the pasta and return it to the pot.  Add the raw arugula and a drizzle of olive oil to the pasta and toss.  Add the fish and sauce and toss to coat well.  Finish with additional fresh scallion, crushed red pepper and additional dressing if desired.  Serve and enjoy :)

Friday, April 22, 2011

Spinach Salad with Chickpeas, Almonds and Sun-dried Tomatoes


The holidays are upon us.  If you are celebrating Passover you have abandoned bread and been reminded of how much you truly love beer.  Maybe you are fasting and swearing off meat in anticipation of Easter.  Or perhaps you just believe in trees and Mother Earth and are celebrating Earth day by eating local, sustainable and low carbon emission foods. Either way you look at it, meal planning this week has some limitations.  This salad is a great option to get you through your bread less, meat less, eco-friendly journey.  It is one of my most favorite salads and I make it almost every week.  You can use goat cheese or feta cheese.  Goat cheese will create a creamy dressing when mixed so it's a healthy substitute if you normally douse your salad in fattening creamy dressing.  Regardless of your beliefs, this week is sure to be full of celebrations with food, family and friends so a light, easy salad is ideal leading up to or following your festivities.

What makes this bite better?
When creating healthy dishes, it is important to balance flavor, color and texture so the food is not only healthy, but appealing.  This salad is so satisfying because it is the perfect combination of fresh flavors, creaminess from the cheese, and crunch from the almonds.  In addition, there are many studies linking chickpea (garbanzo bean) consumption to satiety due to the high content of insoluble fiber found in chickpeas and we all know the important benefits of foods high in insoluble fiber. Chickpeas also provide the necessary protein and fat so there is no need for meat.  Buying canned chickpeas is the easiest and quickest option, just be sure to buy low-sodium if possible to avoid excess sodium intake.  Either way, rinse the chickpeas well under water before using them in the salad.


Spinach Salad with Chickpeas

2 cups organic spinach
1/2 cup low sodium chickpeas
1/4 cup chopped sun-dried tomatoes
1/4 cup goat cheese (or feta) (local and organic if possible)
1/4 cup sliced almonds
1/2 tablespoon extra virgin olive oil
about 1/4 tablespoon fresh squeezed lemon juice (I just squeeze a slice of lemon to taste)
salt and pepper to taste

Clean the spinach and lay on a paper towel to dry.  Add all the ingredients.  Toss to combine.  Serve and enjoy :)

Thursday, April 21, 2011

Braised Pork with Rosemary

The other day I was really in the mood to braise something.  I crave braised foods when I want a savory and comforting dish.  If you are nervous about cooking meat, braising is a fool-proof technique for beginner cooks because it's nearly impossible to mess up.  It creates food that is melt in your mouth delicious and uses minimal fat.

Braising is a combination cooking method that uses both dry and moist heat.  This is ideal for lean cuts to become flavorful, tender and moist.  The meat is first browned and is then cooked in a liquid that becomes the sauce for the meat.  The meat should be fork tender but not falling apart.  Braising is also convenient if you are busy.  You can prepare the dish and then let it cook while you go to the gym and get your laundry done.


What makes this bite better?
Pork always gets a bad rap, especially when it comes to healthy eating.  But pork tenderloin has less fat than chicken. Using a cooking method like braising allows you to infuse lean cuts with flavor and moisture without having to use fatty cuts or excess fat in the preparation.  Pork is a great source of lean protein and is also an excellent source of the B vitamins and other nutrients like iron and zinc.  In addition, this dish uses rosemary and sage to add flavor.  Herbs are loaded with phytochemicals and fresh herbs have been shown to pack more antioxidant power than dried herbs.  

Braised Pork Tenderloin with White Wine Rosemary and Sage
1 pound Pork Tenderloin
1 small white onion, diced
2 pieces garlic, minced
Fresh rosemary (5-6 sprigs)
Fresh sage (half the amount of fresh rosemary)
1 cup white wine
Extra-virgin olive oil

Drizzle olive oil and heat to medium-high.  Do not allow the olive oil to smoke.  Trim the tenderloin of excess fat and cut into pieces if necessary to fit into the pan.  Salt and pepper each side of the pork and place in the pan with half of the sprigs of fresh rosemary.  Allow each side to cook until golden brown, about 3-5 minutes.  Remove from the pan.  In the same pan, add diced onion, minced garlic, fresh rosemary and fresh sage and saute until translucent.  Add one cup white wine and stir gently to remove any caramelization that has accumulated in the pan.  Return the pork to the pan and cook uncovered until the white wine reduces by about half.  Reduce to a simmer, cover and cook for at least 1 1/2 hours. Remove the pork from the sauce and allow it to rest for 10 minutes or so.  Slice it and pour the sauce from the pan over the pork.  Serve and enjoy :)


Thursday, April 14, 2011

Easter Eggs


I get a little carried away with food traditions during holidays and Easter is no exception.  Even when I was little, I would be incredibly meticulous about dying easter eggs.  We would buy the egg dying kits with the wire hooks and wax crayons and I would always be frustrated by how limited my creativity was.  I would sit and carefully balance one half of an egg in purple and then flip the egg to make the other half perfectly red.  Creating intricate invisible messages with my wax crayon would lead to anticipation and anxiety as I waited to see how it turned out.  All my sister's eggs would wind up being variations of green or brown because she would lose patients after 10 seconds and dip the eggs in all the colors.  This drove me crazy.

I don't know why the idea never occurred to me until now, but this year I thought to use water colors to paint my Easter eggs.  I'm sure at this point they have a kit that does this for you.  But every once in a while I think it's important to act like a kid again.  So whip out a paint brush and make a mess.  These pretty eggs will brighten up any Easter brunch, serve as a great center piece for Easter lunch or make unique place settings for Easter dinner.  And you thought dying eggs was only for kids?!


Water Color Easter Eggs
1 water color kit (non-toxic)
1 dozen eggs

Hard boiling Eggs: Bring enough water to boil in a pot that it will cover the eggs by 1-inch.  Once the water comes to a boil, use a spoon to place the eggs in the water.  Once the water begins to boil again, reduce to a simmer and allow to cook 8-10 minutes.  Drain and allow to cool.

Make sure the eggs are completely cool and dry before you paint them.  Save the carton to place the eggs in after they are painted.  Store in the refrigerator.  Serve and enjoy on Easter :)

What makes this bite better?
Hard boiled eggs are a great source of protein and fat in the morning.  I will throw 2 or 3 in a bag with a piece of fruit as a quick breakfast on the go.  I usually eat one egg yolk per two egg whites.  For Easter, these perfectly pretty eggs are a better snack than an egg shaped chocolate or marshmallow.

Thursday, April 7, 2011

Peanut Butter Balls


When it comes to eating healthy, for me, some of the most difficult challenges come during snack time.  Should I hit the vending machine? Is it possible to find a snack that doesn't have high fructose corn syrup in it?  Should I really spend $3.99 on a power bar I don't really want?  Do peanut M&M's count as a source of protein?  Should I feel guilty about eating 2 bags of 100 calorie Oreos?  Is there an ingredient in a bag of Doritos that actually counts as food?

Oh the dilemma.  Snacks have always been tricky for me, but necessary.  Like most people I often fly through the day and count on snacks (and coffee!) to sustain my energy levels between meals.  That's why I created these delicious little power protein peanut butter balls (I dare you to say that 3 times fast).  They are the perfect snack.  No processed sugar and no artificial ingredients plus protein, sweetness and whole grain.  Ah, the perfect solution!

I make these snacks based on what I'm craving for the week.  I use peanut butter or almond butter depending on what I have.  Almond butter is not as sweet or creamy as peanut butter so most people will prefer peanut butter.  I add mini chocolate chips when I want some chocolate or roll them in coconut flakes when I'm feeling creative.  When I'm feeling adventurous, I add both.

Peanut Butter Balls
Makes 8-10
1/4 cup peanut butter (or almond butter)
1 cup oats
1 Tablespoon water
1 Tablespoon honey
1/4 cup mini chocolate chips (optional)
Shredded coconut flakes (optional)

Mix the peanut butter, oats, water and honey in a bowl and mix well.  If you are using mini chocolate chips, mix them in as well.  Form the mixture into 1-inch balls using your hands.  You might need to squeeze the mixture together to get it to stick and then gently roll it between your palms to create a smooth ball shape.  The technique is just like making meatballs.

If you are using coconut flakes, pour them onto a plate or piece of wax paper and roll the ball until it is completely coated.  Place on a piece of wax paper and refrigerate for at least 15 minutes before eating.  Store in the refrigerator.

What makes this bite better?
When choosing a snack, you want to make sure that it has a balance of protein, fat and carbohydrates to keep you full and energized.  The combination of nut butter and oats provide the perfect ratio.  In addition, whenever you enjoy a sweet snack, adding fiber helps regulate the impact of the sugar on your blood sugar levels.  The oats in this snack will slow the absorption of the sugar to prevent a spike in blood sugar that would lead to a crash in energy levels.

Friday, March 25, 2011

Slim Stir Fry


This time next week I will be on a beach in Aruba!  Now, now, don't be jealous....

This means I have only two considerations when planning my meals for the next week.  First, my meals need to be inexpensive because I'm saving all my money to spend at the spa.  Secondly, they have to be light and healthy because my winter body needs to be in a bikini in less than one week. That is why I am making a slim stir fry.  This dish has lots of healthy veggies, organic tofu and low-sodium soy sauce so I don't bloat like a tick.  Low-sodium soy sauce is great because you can add extra flavor without it being too salty.  If you don't have low-sodium soy sauce simply dilute regular soy sauce with water.  This is also an ideal dish for anyone celebrating Lent and looking for a tasty meatless option on Fridays.  I make a large portion and eat it for multiple meals over the week.

Slim Stir Fry

1 small onion, diced
1-2 cloves of garlic, minced
1/2 pound sugar snap peas
3-5 carrots, thinly sliced (you can do this by hand, use a mandolin or buy shredded carrots)
1 pack organic extra firm tofu
1 pack white button mushrooms
3 tablespoons low-sodium soy sauce
extra virgin olive oil
salt

Drizzle extra virgin olive oil in to a wok and heat over medium.  Dice the onion and saute until translucent.  Add the minced garlic, sugar snap peas and carrots and saute gently for about 5 minutes.  In a separate pan, spray cooking spray and heat to high.  Rinse and dry the tofu and cut into cubes about 1/2-1 inch large.  Place in the pan, turning every 2-3 minutes until the tofu is golden brown and slightly crispy on all sides.  Add the mushrooms and the soy sauce to the veggie mixture and saute. Finally, add the tofu and allow the flavors to blend for 3-5 minutes.  Serve over steamed brown rice and enjoy :)

What makes this bite better?
Carrots and onions are some of the most inexpensive vegetables you can buy. They make great bases for dishes, especially when you are on a budget.  Also, organic tofu is one of the least expensive sources of organic protein.  Whenever you are on a budget but want to reap maximum health benefits, remember two guidelines.  First, prioritize the 3 components for a balanced meal- healthy protein, veggies and whole grains. Second- have a variety of colors!  So what if you can't afford 15 varieties of mushrooms.  Try to get as much variety as you can while staying in your budget and keeping your meals balanced.

Wednesday, March 23, 2011

Lentil and Barley "Spring Cleaning" Soup

The past week has been marked with lots of events- erratic weather, the equinox and the first official day of spring- that have all indicated the seasons are changing and spring is coming.  That means it's time for spring cleaning! And your fridge should be no exception. Like any spring cleaning act, it's time to get rid of everything to start fresh for spring.  I always find myself frustrated with what to do with a few leftover carrots, greens that are about to wilt or a half used container of mushrooms.  The spring cleaning solution? Put it all in a soup!

Soups are a great way to use up all your winter veggies before they expire.  For my soup, I added lentils as a source of protein and fiber as well as barley to add whole grains (but also because they had to go!). Carrots, mushrooms and butternut squash made up a bulk of the veggie content and I had fresh dill lying around that I used to season.   Choose your own beans and grains and add any additional veggies you need to get rid of.  You will create a balanced, healthy meal that prevents waste.  In addition, you will be satisfied by that amazingly freeing "spring cleaning" feeling and you will have an easy, hearty soup to help get you through the last of the rainy days.

You can add anything to this soup that you need to get rid of. Based on the vegetables you use, experiment with some spices or seasoning.  Also, while your in your fridge, take the opportunity to get rid of anything that has been lurking there all winter.  Check expiration dates, get rid of that old jar of capers and for god's sake throw away the desserts you've been hoarding since the holidays.  Once the old is out, it's in with the new and soon I will be posting the must have's to stock your kitchen for spring.

Lentil and Barley Spring Cleaning Soup

1 small onion
2 cups of lentils
2 cups of barley (already cooked)
Carrots
Butternut squash
Mushrooms
Dill
Salt
Pepper

Begin with a large pot.  Drizzle olive oil and heat over medium.  Dice the onion and saute until translucent.  Soak the lentils in cold water and remove anything that floats, then rinse again to make sure you have removed any debris.  Add the lentils and saute for a few minutes.  Add 4 cups of water and bring to a boil.  Add the vegetables and spices and reduce to a simmer.  Allow the lentils to become tender.  Then, add additional water until you reach your desired thickness.  Remember to account for the barley that will be added at the end.  I added 8 cups total.  Once the lentils and vegetables have fully cooked, add the barley.   Simmer for 15 more minutes then serve and enjoy :)

Note: If you are using a grain that is not cooked, add it at the same time as the lentils and add the required amount of water it will absorb during cooking, in addition to the 4 cups for the lentils.

What makes this bite better?
Lentils are loaded with fiber, protein and important nutrients.  The high fiber content helps regulate blood sugar levels to keep you fuller longer and they also have cholesterol lowering effects. At about 230 calories per cup, they are a dietary gold mine! They make an amazing base for any soup because they blend well with lots of different flavors.  If you are experimenting in the kitchen this is the perfect base to begin with.  Plus, unlike other legumes, lentils do not require a long pre-soak period so they can be made quickly and easily!